Oracle Database 19c: Grid Infrastructure / RAC Installation - Part 3/3
In this part we do the real installation.
This is a 3 Blog Series and this is Blog 3 (final)
Of this Blog series -
Part 1
Part 2
This assumes
1. You have setup your linux machine
2. Made a clone and changed the hostname
3. Assigned IP addresses to Public and private interfaces
4. Unzipped grid software in /u01/app/190/grid
(unzip -qq V981627-01.zip -d /u01/app/190/grid)
Cluster Pre-install
1. Setup passwordless ssh between users
cd /u01/app/190/grid
2.
[As grid]
$ cd deinstall
$ ./sshUserSetup.sh -user grid -hosts "rac19c01 rac19c02" -noPromptPassphrase -confirm -advanced
2. run Cluster Verification and resolve issues if any
$ cd /u01/app/190/grid
$ ./runcluvfy.sh stage -pre crsinst -n rac19c01,rac19c02 -orainv oinstall -osdba dba -verbose
Ensure Cluster Verification is successfull.
3. Start with Installation
[Next login using grid user]
$ cd /u01/app/190/grid/
$ ./gridSetup.sh
Step 1 -
Step 2 -

Step 3 -

Step 4 -

Step 5 -

Step 6 -

Step 7 - (I have configured not to configure Grid Repo - but you should do so in production)

Step 8 - Change Discover String to "/dev/oracleasm/disks/*"

Step 9 -

Step 9.1 - Set default password - an warning will come if you have not met oracle standards for password. you can ignore and continue.

Step 10 -

Step 11 -

Step 12 -

Step 13 -

Step 14 -

Step 15 -

Step 16 -

Step 16.1 - Ignore RPM DB Check and Continue

Step 17 -

Step 18 -


This is a 3 Blog Series and this is Blog 3 (final)
Of this Blog series -
Part 1
Part 2
This assumes
1. You have setup your linux machine
2. Made a clone and changed the hostname
3. Assigned IP addresses to Public and private interfaces
4. Unzipped grid software in /u01/app/190/grid
(unzip -qq V981627-01.zip -d /u01/app/190/grid)
Cluster Pre-install
1. Setup passwordless ssh between users
cd /u01/app/190/grid
2.
[As grid]
$ cd deinstall
$ ./sshUserSetup.sh -user grid -hosts "rac19c01 rac19c02" -noPromptPassphrase -confirm -advanced
2. run Cluster Verification and resolve issues if any
$ cd /u01/app/190/grid
$ ./runcluvfy.sh stage -pre crsinst -n rac19c01,rac19c02 -orainv oinstall -osdba dba -verbose
Ensure Cluster Verification is successfull.
3. Start with Installation
[Next login using grid user]
$ cd /u01/app/190/grid/
$ ./gridSetup.sh
Step 1 -

Step 2 -

Step 3 -

Step 4 -

Step 5 -

Step 6 -

Step 7 - (I have configured not to configure Grid Repo - but you should do so in production)

Step 8 - Change Discover String to "/dev/oracleasm/disks/*"

Step 9 -

Step 9.1 - Set default password - an warning will come if you have not met oracle standards for password. you can ignore and continue.

Step 10 -

Step 11 -

Step 12 -

Step 13 -

Step 14 -

Step 15 -

Step 16 -

Step 16.1 - Ignore RPM DB Check and Continue

Step 17 -

Step 18 -

Step 18.1 -

Step 18.2
Run Root Scripts as in order
[Node 1 ]
$ /u01/app/oraInventory/orainstRoot.sh
[Node 2 ]
$ /u01/app/oraInventory/orainstRoot.sh
[Node 1 ]
$ /u01/app/190/grid/root.sh
[Node 2 ]
$ /u01/app/190/grid/root.sh
Logs of each can be found in the end of the blog page.
Click "OK" after all the root scripts are executed.
Step 18.3

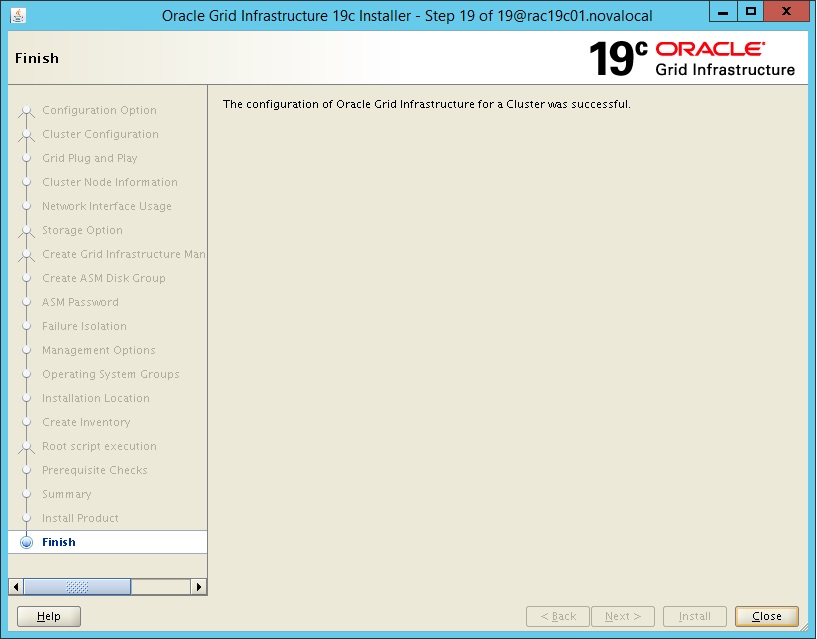
Step 19
Click Close and Complete the Installation
Logs
[Node 1 - orainstRoot.sh]
[root@rac19c01 ~]# /u01/app/oraInventory/orainstRoot.sh
Changing permissions of /u01/app/oraInventory.
Adding read,write permissions for group.
Removing read,write,execute permissions for world.
Changing groupname of /u01/app/oraInventory to oinstall.
The execution of the script is complete.
[Node 2 - orainstRoot.sh]
Changing permissions of /u01/app/oraInventory.
Adding read,write permissions for group.
Removing read,write,execute permissions for world.
Changing groupname of /u01/app/oraInventory to oinstall.
The execution of the script is complete.
[root@rac19c02 ~]# /u01/app/oraInventory/orainstRoot.sh
Changing permissions of /u01/app/oraInventory.
Adding read,write permissions for group.
Removing read,write,execute permissions for world.
Changing groupname of /u01/app/oraInventory to oinstall.
The execution of the script is complete.
[Node 1 - root.sh]Changing permissions of /u01/app/oraInventory.
Adding read,write permissions for group.
Removing read,write,execute permissions for world.
Changing groupname of /u01/app/oraInventory to oinstall.
The execution of the script is complete.
[root@rac19c01 ~]# /u01/app/190/grid/root.sh
Performing root user operation.
The following environment variables are set as:
ORACLE_OWNER= grid
ORACLE_HOME= /u01/app/190/grid
Enter the full pathname of the local bin directory: [/usr/local/bin]:
Copying dbhome to /usr/local/bin ...
Copying oraenv to /usr/local/bin ...
Copying coraenv to /usr/local/bin ...
Creating /etc/oratab file...
Entries will be added to the /etc/oratab file as needed by
Database Configuration Assistant when a database is created
Finished running generic part of root script.
Now product-specific root actions will be performed.
Relinking oracle with rac_on option
Using configuration parameter file: /u01/app/190/grid/crs/install/crsconfig_params
The log of current session can be found at:
/u01/app/grid/crsdata/rac19c01/crsconfig/rootcrs_rac19c01_2019-02-28_10-15-19AM.log
2019/02/28 10:15:31 CLSRSC-594: Executing installation step 1 of 19: 'SetupTFA'.
2019/02/28 10:15:31 CLSRSC-594: Executing installation step 2 of 19: 'ValidateEnv'.
2019/02/28 10:15:31 CLSRSC-363: User ignored prerequisites during installation
2019/02/28 10:15:31 CLSRSC-594: Executing installation step 3 of 19: 'CheckFirstNode'.
2019/02/28 10:15:33 CLSRSC-594: Executing installation step 4 of 19: 'GenSiteGUIDs'.
2019/02/28 10:15:34 CLSRSC-594: Executing installation step 5 of 19: 'SetupOSD'.
2019/02/28 10:15:34 CLSRSC-594: Executing installation step 6 of 19: 'CheckCRSConfig'.
2019/02/28 10:15:34 CLSRSC-594: Executing installation step 7 of 19: 'SetupLocalGPNP'.
2019/02/28 10:15:56 CLSRSC-594: Executing installation step 8 of 19: 'CreateRootCert'.
2019/02/28 10:16:00 CLSRSC-4002: Successfully installed Oracle Trace File Analyzer (TFA) Collector.
2019/02/28 10:16:01 CLSRSC-594: Executing installation step 9 of 19: 'ConfigOLR'.
2019/02/28 10:16:11 CLSRSC-594: Executing installation step 10 of 19: 'ConfigCHMOS'.
2019/02/28 10:16:11 CLSRSC-594: Executing installation step 11 of 19: 'CreateOHASD'.
2019/02/28 10:16:16 CLSRSC-594: Executing installation step 12 of 19: 'ConfigOHASD'.
2019/02/28 10:16:17 CLSRSC-330: Adding Clusterware entries to file 'oracle-ohasd.service'
2019/02/28 10:17:22 CLSRSC-594: Executing installation step 13 of 19: 'InstallAFD'.
2019/02/28 10:17:28 CLSRSC-594: Executing installation step 14 of 19: 'InstallACFS'.
2019/02/28 10:17:35 CLSRSC-594: Executing installation step 15 of 19: 'InstallKA'.
2019/02/28 10:17:41 CLSRSC-594: Executing installation step 16 of 19: 'InitConfig'.
ASM has been created and started successfully.
[DBT-30001] Disk groups created successfully. Check /u01/app/grid/cfgtoollogs/asmca/asmca-190228AM101813.log for details.
2019/02/28 10:19:05 CLSRSC-482: Running command: '/u01/app/190/grid/bin/ocrconfig -upgrade grid oinstall'
CRS-4256: Updating the profile
Successful addition of voting disk d7a8be4444884f37bf1445998e475b4d.
Successful addition of voting disk 5f2c49eeb35d4f71bfa64279bfaa8cb9.
Successful addition of voting disk 93dbea13c3be4f11bf14e05a0556cfac.
Successfully replaced voting disk group with +OCR_VOTE.
CRS-4256: Updating the profile
CRS-4266: Voting file(s) successfully replaced
## STATE File Universal Id File Name Disk group
-- ----- ----------------- --------- ---------
1. ONLINE d7a8be4444884f37bf1445998e475b4d (/dev/oracleasm/disks/OCR_VOTE1) [OCR_VOTE]
2. ONLINE 5f2c49eeb35d4f71bfa64279bfaa8cb9 (/dev/oracleasm/disks/OCR_VOTE2) [OCR_VOTE]
3. ONLINE 93dbea13c3be4f11bf14e05a0556cfac (/dev/oracleasm/disks/OCR_VOTE3) [OCR_VOTE]
Located 3 voting disk(s).
2019/02/28 10:20:25 CLSRSC-594: Executing installation step 17 of 19: 'StartCluster'.
2019/02/28 10:21:27 CLSRSC-343: Successfully started Oracle Clusterware stack
2019/02/28 10:21:27 CLSRSC-594: Executing installation step 18 of 19: 'ConfigNode'.
2019/02/28 10:23:05 CLSRSC-594: Executing installation step 19 of 19: 'PostConfig'.
2019/02/28 10:23:38 CLSRSC-325: Configure Oracle Grid Infrastructure for a Cluster ... succeeded
[Node 2 - root.sh]Performing root user operation.
The following environment variables are set as:
ORACLE_OWNER= grid
ORACLE_HOME= /u01/app/190/grid
Enter the full pathname of the local bin directory: [/usr/local/bin]:
Copying dbhome to /usr/local/bin ...
Copying oraenv to /usr/local/bin ...
Copying coraenv to /usr/local/bin ...
Creating /etc/oratab file...
Entries will be added to the /etc/oratab file as needed by
Database Configuration Assistant when a database is created
Finished running generic part of root script.
Now product-specific root actions will be performed.
Relinking oracle with rac_on option
Using configuration parameter file: /u01/app/190/grid/crs/install/crsconfig_params
The log of current session can be found at:
/u01/app/grid/crsdata/rac19c01/crsconfig/rootcrs_rac19c01_2019-02-28_10-15-19AM.log
2019/02/28 10:15:31 CLSRSC-594: Executing installation step 1 of 19: 'SetupTFA'.
2019/02/28 10:15:31 CLSRSC-594: Executing installation step 2 of 19: 'ValidateEnv'.
2019/02/28 10:15:31 CLSRSC-363: User ignored prerequisites during installation
2019/02/28 10:15:31 CLSRSC-594: Executing installation step 3 of 19: 'CheckFirstNode'.
2019/02/28 10:15:33 CLSRSC-594: Executing installation step 4 of 19: 'GenSiteGUIDs'.
2019/02/28 10:15:34 CLSRSC-594: Executing installation step 5 of 19: 'SetupOSD'.
2019/02/28 10:15:34 CLSRSC-594: Executing installation step 6 of 19: 'CheckCRSConfig'.
2019/02/28 10:15:34 CLSRSC-594: Executing installation step 7 of 19: 'SetupLocalGPNP'.
2019/02/28 10:15:56 CLSRSC-594: Executing installation step 8 of 19: 'CreateRootCert'.
2019/02/28 10:16:00 CLSRSC-4002: Successfully installed Oracle Trace File Analyzer (TFA) Collector.
2019/02/28 10:16:01 CLSRSC-594: Executing installation step 9 of 19: 'ConfigOLR'.
2019/02/28 10:16:11 CLSRSC-594: Executing installation step 10 of 19: 'ConfigCHMOS'.
2019/02/28 10:16:11 CLSRSC-594: Executing installation step 11 of 19: 'CreateOHASD'.
2019/02/28 10:16:16 CLSRSC-594: Executing installation step 12 of 19: 'ConfigOHASD'.
2019/02/28 10:16:17 CLSRSC-330: Adding Clusterware entries to file 'oracle-ohasd.service'
2019/02/28 10:17:22 CLSRSC-594: Executing installation step 13 of 19: 'InstallAFD'.
2019/02/28 10:17:28 CLSRSC-594: Executing installation step 14 of 19: 'InstallACFS'.
2019/02/28 10:17:35 CLSRSC-594: Executing installation step 15 of 19: 'InstallKA'.
2019/02/28 10:17:41 CLSRSC-594: Executing installation step 16 of 19: 'InitConfig'.
ASM has been created and started successfully.
[DBT-30001] Disk groups created successfully. Check /u01/app/grid/cfgtoollogs/asmca/asmca-190228AM101813.log for details.
2019/02/28 10:19:05 CLSRSC-482: Running command: '/u01/app/190/grid/bin/ocrconfig -upgrade grid oinstall'
CRS-4256: Updating the profile
Successful addition of voting disk d7a8be4444884f37bf1445998e475b4d.
Successful addition of voting disk 5f2c49eeb35d4f71bfa64279bfaa8cb9.
Successful addition of voting disk 93dbea13c3be4f11bf14e05a0556cfac.
Successfully replaced voting disk group with +OCR_VOTE.
CRS-4256: Updating the profile
CRS-4266: Voting file(s) successfully replaced
## STATE File Universal Id File Name Disk group
-- ----- ----------------- --------- ---------
1. ONLINE d7a8be4444884f37bf1445998e475b4d (/dev/oracleasm/disks/OCR_VOTE1) [OCR_VOTE]
2. ONLINE 5f2c49eeb35d4f71bfa64279bfaa8cb9 (/dev/oracleasm/disks/OCR_VOTE2) [OCR_VOTE]
3. ONLINE 93dbea13c3be4f11bf14e05a0556cfac (/dev/oracleasm/disks/OCR_VOTE3) [OCR_VOTE]
Located 3 voting disk(s).
2019/02/28 10:20:25 CLSRSC-594: Executing installation step 17 of 19: 'StartCluster'.
2019/02/28 10:21:27 CLSRSC-343: Successfully started Oracle Clusterware stack
2019/02/28 10:21:27 CLSRSC-594: Executing installation step 18 of 19: 'ConfigNode'.
2019/02/28 10:23:05 CLSRSC-594: Executing installation step 19 of 19: 'PostConfig'.
2019/02/28 10:23:38 CLSRSC-325: Configure Oracle Grid Infrastructure for a Cluster ... succeeded
[root@rac19c02 ~]# /u01/app/190/grid/root.sh
Performing root user operation.
The following environment variables are set as:
ORACLE_OWNER= grid
ORACLE_HOME= /u01/app/190/grid
Enter the full pathname of the local bin directory: [/usr/local/bin]:
Copying dbhome to /usr/local/bin ...
Copying oraenv to /usr/local/bin ...
Copying coraenv to /usr/local/bin ...
Creating /etc/oratab file...
Entries will be added to the /etc/oratab file as needed by
Database Configuration Assistant when a database is created
Finished running generic part of root script.
Now product-specific root actions will be performed.
Relinking oracle with rac_on option
Using configuration parameter file: /u01/app/190/grid/crs/install/crsconfig_params
The log of current session can be found at:
/u01/app/grid/crsdata/rac19c02/crsconfig/rootcrs_rac19c02_2019-02-28_10-24-21AM.log
2019/02/28 10:24:27 CLSRSC-594: Executing installation step 1 of 19: 'SetupTFA'.
2019/02/28 10:24:27 CLSRSC-594: Executing installation step 2 of 19: 'ValidateEnv'.
2019/02/28 10:24:27 CLSRSC-363: User ignored prerequisites during installation
2019/02/28 10:24:27 CLSRSC-594: Executing installation step 3 of 19: 'CheckFirstNode'.
2019/02/28 10:24:28 CLSRSC-594: Executing installation step 4 of 19: 'GenSiteGUIDs'.
2019/02/28 10:24:29 CLSRSC-594: Executing installation step 5 of 19: 'SetupOSD'.
2019/02/28 10:24:29 CLSRSC-594: Executing installation step 6 of 19: 'CheckCRSConfig'.
2019/02/28 10:24:29 CLSRSC-594: Executing installation step 7 of 19: 'SetupLocalGPNP'.
2019/02/28 10:24:30 CLSRSC-594: Executing installation step 8 of 19: 'CreateRootCert'.
2019/02/28 10:24:30 CLSRSC-594: Executing installation step 9 of 19: 'ConfigOLR'.
2019/02/28 10:24:33 CLSRSC-594: Executing installation step 10 of 19: 'ConfigCHMOS'.
2019/02/28 10:24:33 CLSRSC-594: Executing installation step 11 of 19: 'CreateOHASD'.
2019/02/28 10:24:35 CLSRSC-594: Executing installation step 12 of 19: 'ConfigOHASD'.
2019/02/28 10:24:35 CLSRSC-330: Adding Clusterware entries to file 'oracle-ohasd.service'
2019/02/28 10:24:52 CLSRSC-4002: Successfully installed Oracle Trace File Analyzer (TFA) Collector.
2019/02/28 10:25:40 CLSRSC-594: Executing installation step 13 of 19: 'InstallAFD'.
2019/02/28 10:25:41 CLSRSC-594: Executing installation step 14 of 19: 'InstallACFS'.
2019/02/28 10:25:43 CLSRSC-594: Executing installation step 15 of 19: 'InstallKA'.
2019/02/28 10:25:44 CLSRSC-594: Executing installation step 16 of 19: 'InitConfig'.
2019/02/28 10:25:52 CLSRSC-594: Executing installation step 17 of 19: 'StartCluster'.
2019/02/28 10:26:43 CLSRSC-343: Successfully started Oracle Clusterware stack
2019/02/28 10:26:43 CLSRSC-594: Executing installation step 18 of 19: 'ConfigNode'.
2019/02/28 10:26:56 CLSRSC-594: Executing installation step 19 of 19: 'PostConfig'.
2019/02/28 10:27:02 CLSRSC-325: Configure Oracle Grid Infrastructure for a Cluster ... succeeded